
Halloween is a time that sparks our creativity. The jack-o’-lantern is a key symbol of this season. It’s a carved pumpkin that lights up in the dark. This guide is for both experts and beginners who want to carve a pumpkin like a pro.
Key Takeaways
- Learn the essential techniques for carving a pumpkin, from choosing the right pumpkin to illuminating your masterpiece.
- Discover pumpkin carving patterns, designs, and ideas to unleash your creativity.
- Understand the importance of pumpkin carving safety and how to preserve your carved creation.
- Explore a variety of pumpkin carving tools and materials to make the process easier and more enjoyable.
- Get inspired by expert tips and tricks to elevate your pumpkin carving skills.
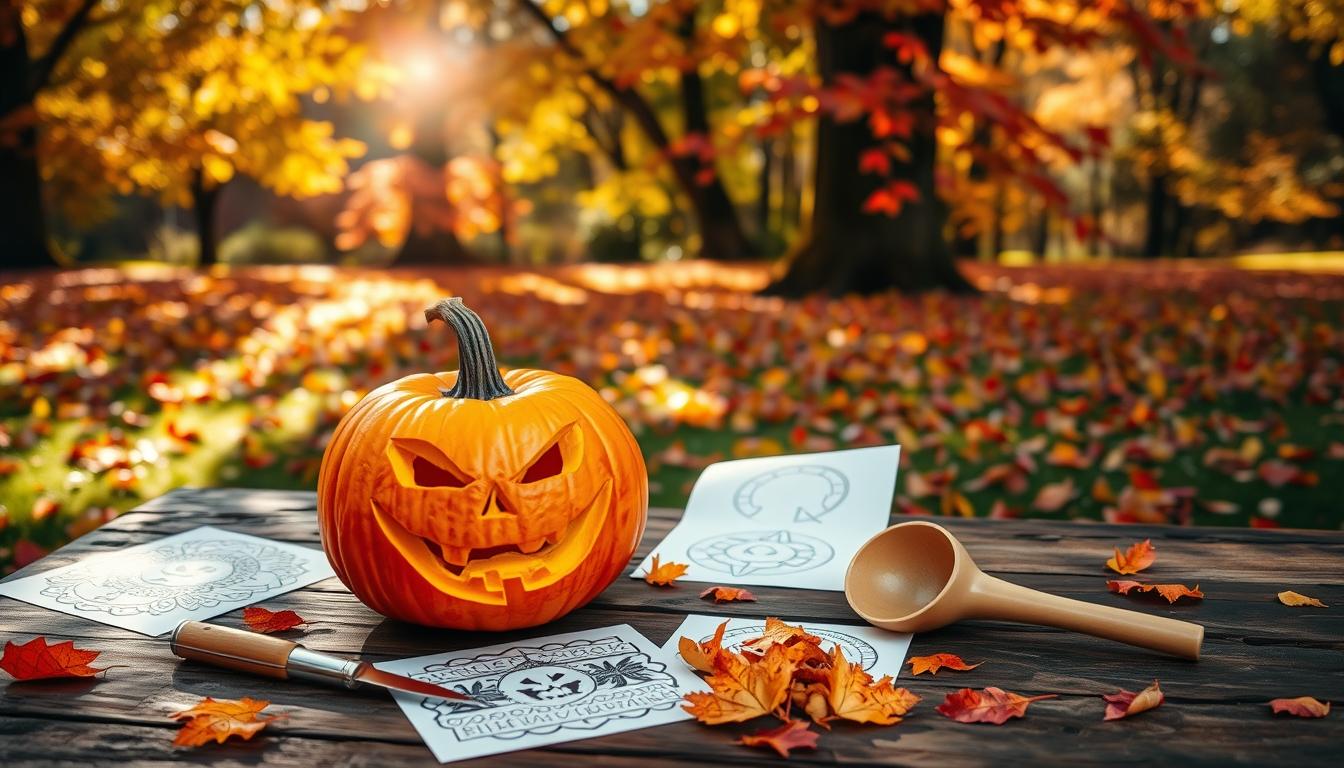
How to Carve a Pumpkin?
Learn the Tricks to Carve a Pumpkin Like a Pro
Carving a pumpkin is a fun autumn tradition. It lets you show off your creativity and turn a plain pumpkin into something spooky or whimsical. To make sure your pumpkin carving goes smoothly, you need to know the right techniques and tools. Let’s go through the steps to carve a pumpkin like a pro.
First, pick the right pumpkin. Look for one that’s smooth, symmetrical, and firm. Make sure the stem is green and intact. The stem helps keep the pumpkin fresh, so avoid pumpkins with broken or brown stems. Experts say a pumpkin should be about 1/2 to 3/4 inch thick for best results.
After picking your pumpkin, set up your workspace. Cover a clean surface with newspapers or a big garbage bag to catch any mess. You’ll need a pumpkin carving kit with tools like a keyhole saw and sculpting tools. For detailed designs, you might also use household items like an ice cream scoop or a filet knife.
| Pumpkin Carving Tool | Purpose |
|---|---|
| Keyhole Saw | Cutting the lid and intricate designs |
| Sculpting Tools | Shaping and detailing the pumpkin’s interior |
| T Pins | Securing stencils or templates to the pumpkin |
| Ice Cream Scoop | Scooping out the pumpkin’s insides |
| Filet Knife | Delicate carving and detail work |
| Paring Knife | Slicing and trimming the pumpkin |
| Lemon Zester | Creating fine details and textures |
| Vegetable Peeler | Scraping and shaping the pumpkin’s surface |
Now you’re set to carve a pumpkin like a pro. Always be careful with sharp tools and keep your area well-lit for safety.
Choosing the Perfect Pumpkin
Choosing the right pumpkin is key for a great carving experience. Look for pumpkins with firm, smooth skin and a green stem. A green stem means the pumpkin is fresh. Stay away from pumpkins with soft spots or missing stems as they can rot quickly.
Think about the shape and size of the pumpkin for your design. Tall pumpkins are good for vertical patterns, while short ones work for horizontal designs. If you’re stacking pumpkins, check how your design will look from one to the next.
At one farm stand, you can find over a dozen pumpkin types, offering many sizes and shapes. The Hobbit pumpkin weighs 10 to 12 pounds and turns orange when ripe. For bigger jack-o’-lanterns, try the Gold Rush or Wolf pumpkins, which weigh 15 to 35 pounds.
Choose a pumpkin that feels solid when you lift it and sounds hollow when tapped. It should have even coloring and no scratches or dark spots. A heavy pumpkin that feels solid is likely fresh.
Carving pumpkins are thinner and easier to cut than baking pumpkins. Don’t carry pumpkins by the stem. Instead, carry them from the bottom or use a bag. With the right pumpkin, you’ll make a great Halloween masterpiece.
Pumpkins keep best in cool places, either inside or outside. But, hard freezes can ruin them. Some people use bleach water to prevent rot, but it’s not needed for decorations.
The best pumpkin for carving has a hard rind, is orange, and has no cracks. Follow these tips to pick the perfect pumpkin and make a jack-o’-lantern everyone will love.
Preparing Your Workspace
Set Up for Carving Success
Before you start carving pumpkins, make sure your workspace is ready. Cover your work area with a disposable tablecloth or a large garbage bag. This will catch any pumpkin pulp and seeds that might get away.
Collect your carving tools like an ice cream scoop, filet knife, paring knife, lemon zester, and vegetable peeler. These tools will make carving easy. Don’t forget a large bowl for the pumpkin seeds and strings you’ll remove.
Have a Sharpie or washable marker ready for drawing your design on the pumpkin. If you’re using a stencil, prepare transfer paper or push pins to keep it in place.
Keep a can of bathroom cleaner with bleach close by. Spraying the pumpkin with this solution will help keep it fresh and prevent bacteria from growing. With your pumpkin carving setup ready, you can begin carving your masterpiece!
“The key to a successful pumpkin carving experience is preparation. By setting up your workspace and gathering the right supplies for pumpkin carving, you’ll be able to unleash your creativity and produce a stunning jack-o’-lantern that will be the envy of the neighborhood.”
Cutting the Lid
Carving a pumpkin is a fun tradition for people of all ages during Halloween. Marc Evan, co-founder of Maniac Pumpkin Carvers in New York City, says the first step is to cut the top off the pumpkin. This makes the perfect pumpkin carving lid.
Start by picking a pumpkin with a green stem. This means it’s fresh and will last longer. Use a serrated knife to draw a circle 2 inches from the stem. Then, tilt the blade at a 45-degree angle towards the stem and push it in.
Continue sawing along the line until you can take off the lid. This cut helps the lid stay in place and makes it easy to put back on. Make sure the hole is big enough for your hand to get inside and remove the seeds and pulp.
You can also cut a hole in the bottom of the pumpkin. This lets you place a candle or light right on the cut-out base. Experts suggest this method too.
Always dry your hands and tools while carving to avoid accidents. With these tips, you’ll be ready to make a beautiful pumpkin carving lid for your Halloween.
Scooping Out the Insides
Carving a pumpkin is an art that requires skill. One key step is scooping out the insides. This messy task is crucial for your creative project. Let’s look at how to clean out a pumpkin for carving.
Begin by taking off the pumpkin’s lid. Then, use your hands to pull out the pulp and seeds. Put these stringy parts in a big bowl. You can roast the seeds later for a tasty snack.
- Use a sturdy spoon, ice cream scoop, or specialized pumpkin scraper to scrape the inside walls of the pumpkin, removing every last bit of the gloppy mess.
- Aim to leave the pumpkin walls about 1-2 inches thick. This will provide enough structure for carving without being too thick.
- Be sure to save those pumpkin seeds – they make a crunchy, tasty treat when roasted with a bit of oil and seasoning.
Cutting a pumpkin from the bottom is the least messy and simplest way to start cleaning it out. Kids can use a melon baller for fun designs like eyes. For detailed work, use a smaller knife to keep control.
| Tool | Purpose |
|---|---|
| Pumpkin Carving Saw | Cutting sections of the pumpkin |
| Serrated Pumpkin Scoop | Scraping the internal material |
| Large Clay Loop | Sculpting the pumpkin |
After scooping out the insides and prepping the walls, you’re set to carve your design. Remember, a hollow pumpkin starts to rot quickly after opening. Work fast to keep your masterpiece safe.
Designing Your Pumpkin
Pumpkin carving is more than just scooping out the insides and carving a simple face. It’s a chance to show off your creativity and turn a simple gourd into art. You can go for freehand designs or use intricate patterns. The main thing is to let your imagination run free.
For freehand designs, begin by sketching your idea on the pumpkin with a washable marker. This gives you total creative freedom. But, have a damp paper towel ready to fix any mistakes. If you want detailed pumpkin carving designs, print a pumpkin carving template and stick it to the pumpkin. Use a push pin or fork to poke holes along the stencil, making a guide for carving.
For a quick and easy design, use cookie cutters and a rubber mallet to make fun shapes. Or, try a drill to create unique patterns on the pumpkin. No matter what method you pick, let your creativity show.

Whether you’re carving a classic jack-o’-lantern, a spooky figure, or something whimsical, the options are endless. So, let your inner artist out and have fun making your pumpkin a unique masterpiece.
Carving Techniques
Carving the perfect pumpkin is an art that needs a gentle touch and the right tools. Begin at the center of your design and move outward. Use a serrated knife or tools from your pumpkin carving kit. Cut through the pumpkin skin with an up-and-down sawing or rocking motion.
For small or detailed parts, use a sharp paring knife. If you’re removing pieces, like eyes or a mouth, use toothpicks to hold them in place. Experts suggest using tools like linoleum cutters, miniature saws, and drills for complex designs.
Pumpkins with deep ridges are harder to carve, so start with a smooth one. The best thickness for carving is between 3/4 and 1 inch. David LaRochelle, a top pumpkin carver, recommends using 4 to 8 votive candles per pumpkin for a bright look. He also suggests trying out different designs like symbols, scenes, animals, or objects.
To keep your carved pumpkin fresh, soak it in water after carving. For a permanent pumpkin carving set, consider sculpting tools or a $5-$10 sculpting clay tool set. These tools help with detailed shaving and texturing.
The secret to great pumpkin carving is to be creative and enjoy it. So, get your tools, show your artistic side, and let your pumpkin be a masterpiece!
Pumpkin Carving Patterns and Designs
The world of pumpkin carving is full of endless possibilities! You can go for classic jack-o’-lantern faces or try intricate silhouettes and patterns. There’s a pumpkin carving project for every skill level and style. Embrace traditional spooky motifs like ghosts, bats, and skulls, or create your own unique designs.
Adding a personal touch is a great idea. Carve names, monograms, or holiday messages into your pumpkin. Use pumpkin carving pattern books, pumpkin carving stencils, or online pumpkin carving templates for detailed designs. Or, let your creativity flow with a freehand masterpiece. The most important thing is to show off your creativity.
This website has been a go-to for 26 years, offering nearly 1,000 free pumpkin carving patterns. It’s now an ad-free site, focusing on privacy. All pumpkin carving patterns are free. You can support the site and its rescue kitties by using the “Buy Me a Coffee” feature.
| Pumpkin Carving Pattern Categories | Percentage of Total Designs |
|---|---|
| Halloween-themed | 80% |
| Fall-themed (surface carving) | 15% |
| Unique/Creative (incorporating additional materials) | 20% |
| Animal-themed | 30% |
The patterns cover many themes like Americana, Cats, Witches & Magick, Classic Jacks, Fairy Tales, and more. The site is a place where pumpkin carving fans can be creative without ads.

There are guides for making unique pumpkins like the “Mini Playhouse Pumpkin” and “Monster Candy Bowl Pumpkin”. These are perfect for those who love creative pumpkin carving. The instructions use various tools like cookie cutters, power drills, and melon ballers. This shows a wide range of techniques for all skill levels.
Illuminating Your Pumpkin
Lighting up your carved pumpkin is key to making it stand out. The classic candle look is still popular for Halloween, but LED lights are safer and last longer. You can put LED fairy lights inside the pumpkin, with the cord coming out the back to plug in. For more drama, try a flickering LED tealight or a jar with lights inside the pumpkin.
Remember to make a small hole in the top or back for smoke if you use a real candle. With the right lights, your pumpkin will glow and add a spooky feel to your night.
| Lighting Option | Pros | Cons |
|---|---|---|
| Traditional Candle | Provides a classic, flickering effect | Potential fire hazard, limited burn time |
| Battery-Operated LED Lights | Safer, longer-lasting, customizable lighting | Requires power source, may not provide same ambiance |
| Flickering LED Tealight | Replicates candle-like flicker, battery-powered | Limited illumination compared to LED strands |
Choosing the right lighting is important to show off your pumpkin and set the mood for Halloween.
Preserving Your Pumpkin
Carved pumpkins don’t last long, usually from 3 days to 3 weeks. But, you can make them last longer with some simple tips. These methods will help keep your pumpkin looking great for weeks.
Extend the Life of Your Masterpiece
First, pick a pumpkin without any marks and carve it right away. Then, spray the inside and outside with a mix of 3 tablespoons of bleach to 3 gallons of water or peppermint dish soap solution. This stops it from rotting early and keeps mold and pests away. You can also put a thin layer of petroleum jelly or vegetable oil on the carved parts to keep it moist.
For extra protection, you can use a pumpkin preservative spray like Pumpkin Fresh. But, avoid using tea tree oil because it’s bad for pets and kids.
Keep your carved pumpkin in a cool, dark spot like the fridge or basement when it’s not out. If it starts to dry out, soak it in cold water to bring it back to life. With the right care, your pumpkin can last weeks.

If you plan to eat your pumpkin, carve it close to Halloween for the best taste. Always keep any treated pumpkins away from kids and pets.
By following these easy steps, you can make carved pumpkins last longer. Enjoy your hard work for many weeks!
Pumpkin Carving Safety
Pumpkin carving is a fun fall tradition, but safety is key. Most Halloween injuries happen to hands and fingers, with kids getting hurt half the time. It’s important to be careful.
Here are some key safety tips for pumpkin carving:
- Don’t let kids carve pumpkins, even if they think they can do it. They might get hurt badly.
- Big knives aren’t always better for carving pumpkins. They can get stuck and cause injuries.
- Use pumpkin carving kits with small serrated saws. They’re safer if they get stuck.
- Always cut away from your body to avoid getting hurt if the knife slips.
- Carve on a stable surface covered with paper or a tablecloth to catch spills.
- Be careful with real candles. Consider using LED lights instead to avoid fire risks.
By following these tips, pumpkin carving can be safe and fun for everyone, especially kids. Always put safety first during this festive activity.
“Every Halloween season, we see 4-5 patients, both adults and children, with severe injuries to their hands and fingers from pumpkin carving,” says Dr. Hani Henein, a hand surgeon at The Hand Center of Western Massachusetts in Springfield.
Severe injuries from pumpkin carving can need surgery and up to four months of rehab. Minor cuts might be treated at home, but serious bleeding or loss of finger movement means a trip to the ER.
By focusing on pumpkin carving safety tips, you can have a great time carving pumpkins with your family. And you’ll avoid the risk of serious injuries.
Pumpkin Carving Ideas and Inspiration
The world of pumpkin carving is full of creative possibilities. You can go from traditional jack-o’-lantern faces to intricate designs inspired by movies, TV shows, or video games. Let your favorite stories come to life on your pumpkin.
For a fun twist, try carving playful patterns or 3D elements. You can also use a drill or cookie cutters for unique designs. Let your imagination guide you as you create a special pumpkin.
Pumpkin Carving Inspirations
- Spooky skull face designs
- Adorable cat-themed carvings
- Haunting “puking” pumpkins with exposed guts
- Whimsical pineapple-inspired patterns
- Intricate botanical and abstract designs
- Playful polka dot and geometric shapes
- Iconic pop culture characters like Baby Yoda
- Unique 3D elements for added depth and dimension
There are so many ways to make your pumpkin stand out. Let your creativity shine this Halloween.
| Pumpkin Carving Idea | Occurrence Rate |
|---|---|
| Pumpkins showcasing a witch stirring a brew in her cauldron as smoke spews out | Not specified |
| Pumpkins with toothy grins | Not specified |
| Pumpkins featuring a modern cat design using a power drill technique | Not specified |
| Skull face pumpkin designs | Not specified |
| Pumpkins inspired by ceramic displays with abstract botanical patterns | Not specified |
| Pineapple-themed pumpkins with realistic carvings | Not specified |
| RV-themed pumpkin creations requiring multiple pumpkins and squash details | Not specified |
| Pumpkins spray-painted black for a unique look | Not specified |
| Cute cat-themed pumpkin carvings | Not specified |
| Pumpkins carved to appear impaled on a fence | Not specified |
These ideas and more can help you make a unique pumpkin. Let your creativity shine this Halloween.

Conclusion
Carving pumpkins is a fun way to show off your creativity and celebrate Halloween. This guide has shown you how to pick the best pumpkin, set up your space, and carve amazing designs. It covers everything from choosing the right tools to keeping your pumpkin looking great.
Now, it’s time to get creative and impress everyone with your pumpkin carving skills. Whether you’re new to this or have been doing it for years, this guide has all the tips you need. So, let your imagination soar and make a pumpkin that captures the Halloween spirit.
Happy Halloween pumpkin carving!
FAQ
How do I choose the perfect pumpkin for carving?
Look for a pumpkin with firm, unblemished skin and an intact, green stem. Avoid pumpkins with soft spots, bruises, or missing stems, as these can lead to premature rotting. Consider the shape and size of the pumpkin based on your desired design – taller, oblong pumpkins work best for vertical patterns, while short, squat ones are better for horizontal designs.
What tools do I need for pumpkin carving?
The standard pumpkin carving tool kit can get the job done, but experts recommend using household items like an ice cream scoop, filet knife, paring knife, lemon zester, and vegetable peeler for scraping, cutting, and creating detailed designs.
How do I cut the lid off the pumpkin?
Using a serrated knife, draw a circle with a 2-inch radius from the stem. Tilt the blade at a 45-degree angle towards the stem and push it into the pumpkin. Saw along the outline until you can remove the lid. This angled cut will prevent the lid from falling inside the pumpkin.
How do I scoop out the pumpkin’s insides?
Start by pulling out as much of the pulp and seeds as possible by hand, placing them in a large bowl. Then, use a sturdy spoon, ice cream scoop, or scraper from a pumpkin carving kit to scrape the inside walls of the pumpkin, removing every last bit of the gloppy mess. Aim to leave the pumpkin walls about 1-2 inches thick.
How do I design my pumpkin carving?
You can either freehand a design directly on the pumpkin’s surface using a washable marker, or print out a pumpkin carving stencil and tape or pin it to the pumpkin. Use a push pin or fork to poke holes along the stencil’s outline, creating a dotted guideline to follow as you carve.
What are some pumpkin carving techniques?
Use a serrated knife or the sharp tools from your pumpkin carving kit, employing an up-and-down sawing or rocking motion to cut through the thick pumpkin skin. For small or intricate details, switch to a sharp paring knife. Professional carvers recommend using specialty tools like linoleum cutters, miniature saws, and drills to achieve more advanced, textured effects.
How do I illuminate my carved pumpkin?
While the classic flickering candle still makes for a spooky Halloween display, battery-operated LED lights are a safer and longer-lasting alternative. Simply ball up a strand of LED fairy lights and place them inside the pumpkin, allowing the cord to trail out the back panel to a power source.
How can I make my carved pumpkin last longer?
To extend the life of your carved pumpkin, spray the interior and exterior with a mixture of Dr. Bronner’s peppermint soap, peppermint oil, and water, or white vinegar, then apply a thin layer of petroleum jelly to the exposed flesh. Store your carved pumpkin in a cool, dark place like the refrigerator or a basement when not on display, and soak it in cold water if it begins to shrivel.
What safety precautions should I take when carving pumpkins?
Always cut away from your body to prevent injury if the blade slips. If children are involved, have an adult handle the cutting tasks, and encourage them to focus on the design and decoration aspects. Carve your pumpkin on a stable, flat surface covered with newspapers or a disposable tablecloth to catch any mess. Additionally, be cautious when using real candles, and opt for battery-operated LED lights if possible to eliminate fire hazards.